 PODspy

A poster’s aspect ratio is its shape, written as width to height. A 12 × 18-inch poster and a 24 × 36-inch poster are both 2:3. They can show the same composition at different sizes if the source has enough pixels. A 16 × 20-inch poster is 4:5. Filling it from the same tall source changes what appears at the top and bottom. Check the shape and the remaining pixels before adding it to your listing.
The creative shortcut
- Group offered poster sizes by width-to-height ratio before making files.
- Overlay the widest portrait crop on the original layout and look for lost subjects or type.
- Calculate pixels per inch after the crop and verify every final provider preview.
Group the sizes you actually plan to sell
Start with a specific paper product and print provider. Write its available sizes in width-by-height order. Reduce each pair to its aspect ratio. The U.S. Printful Enhanced Matte Paper Poster listing, for example, shows 12 × 18 and 24 × 36 inches at 2:3, 18 × 24 at 3:4, and 16 × 20 at 4:5. These are listed poster sizes. Check the file guidelines for the actual upload area.
Choose a first ratio and keep its editable master. Add other ratios when you can prepare and proof the new compositions. Sizes in one family can usually share the layout, but they can still need different exports if the supplier specifies different file dimensions or bleed.
Find out what the crop will remove
Start with a 3,600 × 5,400-pixel portrait file. At the same source width, a 3:4 crop retains 4,800 pixels of height. A 4:5 crop retains 4,500. A centered 4:5 crop trims 450 pixels from both the top and the bottom, for a total of 900 pixels. The train still fits in the example, but its caption sits in the bottom band that gets cut.
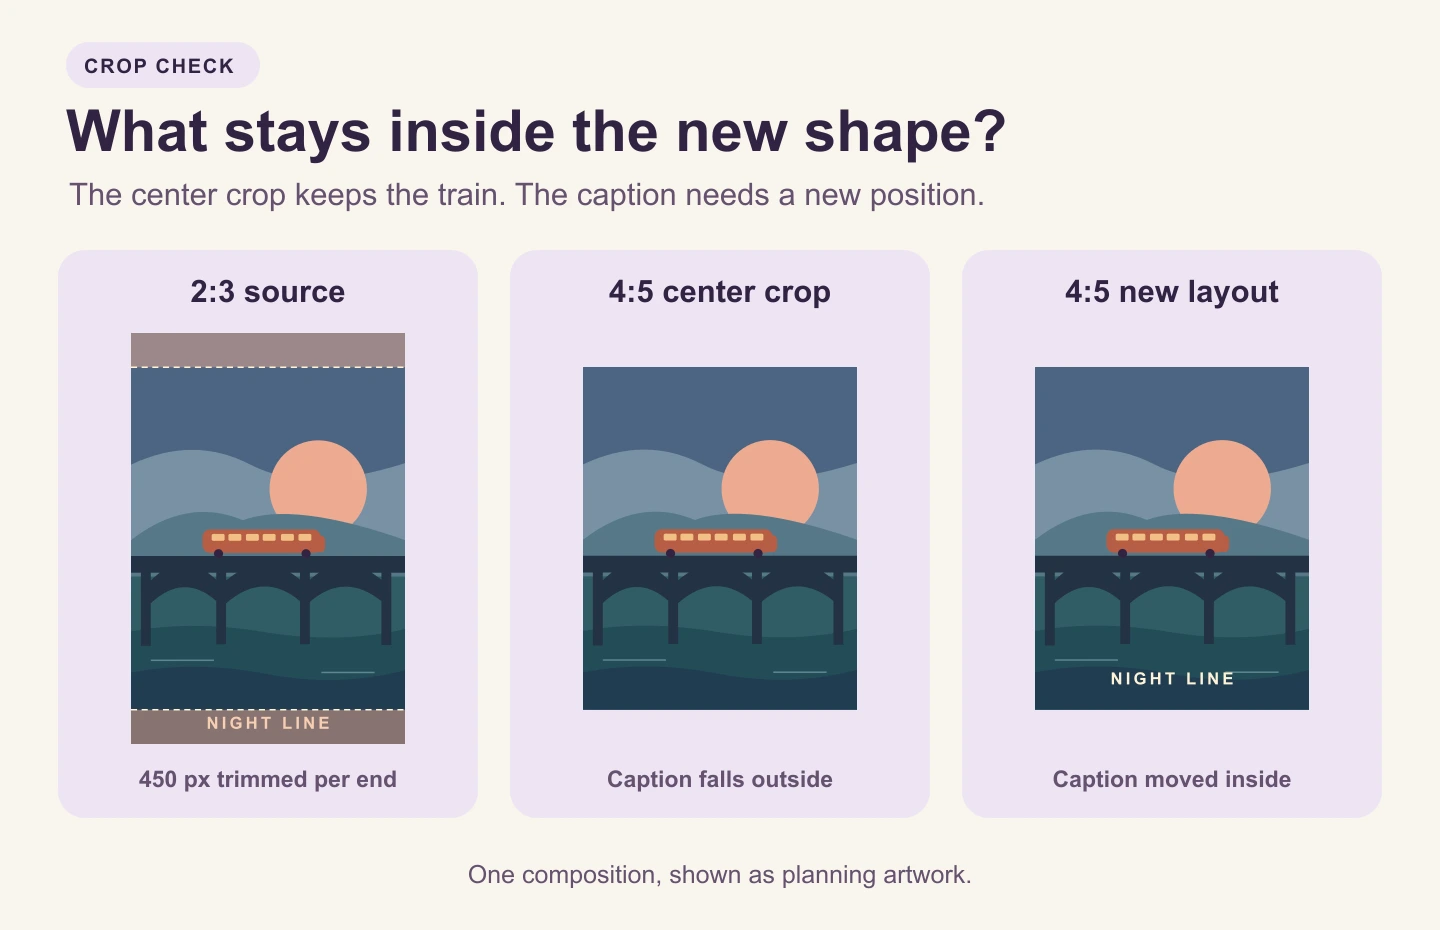
Use this quick check for a wider portrait ratio: multiply the source width by the target height, then divide by the target width. Subtract that result from the source height to find how much a full-bleed crop removes. Preview the actual crop. Moving the crop up or down trades off what disappears from opposite edges.
If the subject and type both fit, keep the crop. If the art must stay intact, make a deliberate border on the target artboard. If the design needs to fill the sheet and the crop breaks it, build a separate layout with the subject, background and caption on separate layers. This lets you move the title without stretching the artwork.
Check the pixels you have after cropping
Divide each retained pixel dimension by the intended print dimension in inches. A 3,600 × 5,400 source gives 300 pixels per inch at 12 × 18 inches, and 150 at 24 × 36. After the 4:5 crop, the 3,600 × 4,500 file gives 225 pixels per inch at 16 × 20. Changing the resolution label in the file settings cannot create detail that is missing from the source.
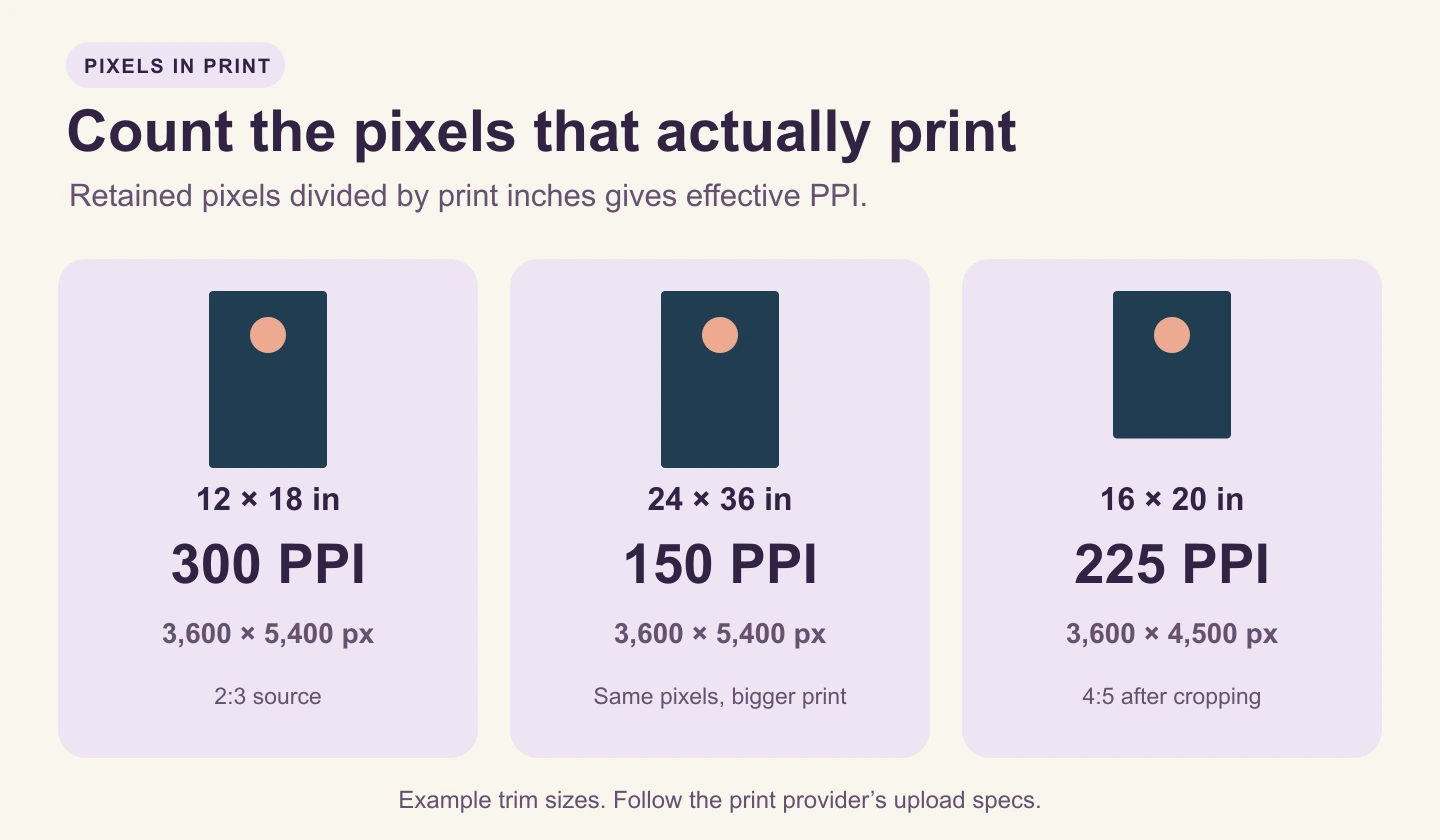
If your 16 × 20 variant calls for 300 PPI, you need 4,800 × 6,000 pixels for the trim area. Build it from a higher-resolution original or editable vector shapes, then export at the required dimensions. If the source still falls short, choose a smaller listed size or review an upscaled file closely before offering it. Use the provider’s own resolution and file-size requirements.
Start with artwork that leaves room to adapt
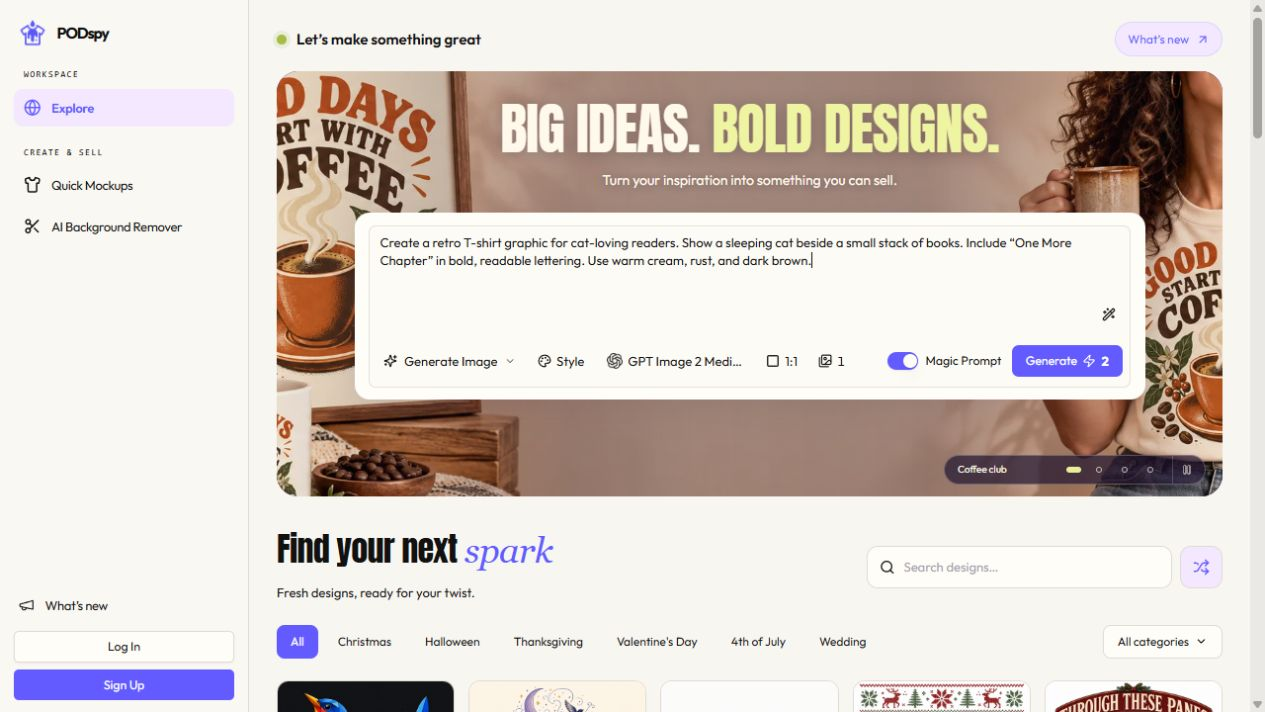
The brief below opens in PODspy’s Generate Image workspace as editable text. It asks for a scene that stays legible through different crops. After choosing to generate, check the actual aspect ratio and pixel dimensions of your result before placing it. Add type separately in your layout so you can reposition it for another ratio.
Save an editable file for each ratio. Preserve the source illustration before cropping and keep the print-ready exports separate from listing images.
Create a portrait wall art illustration in a 2:3 composition of a rust-orange rail car crossing a dark viaduct at dusk. Use a muted coral sun, broad slate-blue sky, dark teal water, and a restrained mid-century screen-print palette. Group the train, sun and bridge close to the middle so they still read when the top and bottom are cropped. Leave quiet sky and water for alternate layouts. Use broad clean shapes and keep the background continuous to the edges. Show flat artwork only, with no typography, logos, frames, room scene, mockup, border, or crop marks.
Proof every physical poster variant
Read the exact provider instructions for each print size. If the template has a bleed area, extend background art across it and keep essential details inside the indicated safe area. Check whether the template is available for your product and hide its guide layers before export. The dimensions you calculate for the finished poster may differ from the dimensions of the upload.
Review the uploaded preview for each offered variant. Check the title, borders, edges and orientation. If you sell a framed or matted option, check how much of the artwork will be visible with that frame or mat. Use a listing image that matches the actual version a customer selects.
Keep a short file map such as 12x18_2x3, 24x36_2x3 and 16x20_4x5. Record which file and preview belong to each variant. If a preview clips anything important, fix the layout or leave that size off the listing until it passes.


