 PODspy

Etsy thumbnail cropping can hide a T-shirt’s printed phrase even when the full listing image looks fine. Start with a sharp source, keep the important artwork away from vulnerable edges, and check more than one thumbnail shape. Adding pixels alone will not fix a composition that puts the design outside the visible crop.
The creative shortcut
- Judge the printed words and illustration as well as the garment silhouette.
- Give the whole product more room without changing the apparent print size.
- Finish with Etsy’s own thumbnail previews before publishing.
Start with the current guidance, not a universal ratio
Etsy’s current Help Center recommends listing images at least 2,000 pixels wide and 2,000 pixels high. It describes a landscape or square first photo, then asks sellers to check square, portrait and landscape thumbnail views. That is different from a promise that every placement uses one fixed ratio.
Keep an untouched original and make a separate listing copy. A 2,400 × 2,400-pixel image can have plenty of source pixels and still lose important content when a shorter window is taken from it. Image dimensions tell you how much detail you have; composition decides which detail remains visible.
This guide is about the image a shopper sees. Keep the production artwork you send to your printer separate from the listing photograph or mockup. Changing a shop thumbnail should not alter the print file.
Why a large square can still lose the bottom line
Take a 2,400 × 2,400-pixel square and place a centered 4:3 window over it. At the original width, that window is 1,800 pixels tall: 2,400 ÷ (4/3). A centered crop leaves out 300 pixels at the top and another 300 at the bottom.
Words near the bottom of the source can therefore disappear even though the original exceeds the recommended image dimensions. Enlarging the same square to 4,800 × 4,800 does not change the fraction of the composition being removed. It creates bigger versions of the same vulnerable edges.
The practical repair is a different frame: use an uncropped original, photograph from farther back, or choose a scene with more space around the product. Do not stretch the garment vertically or squash the lettering to squeeze it into the window.
- Square example: the entire 2,400 × 2,400 source is visible.
- Landscape example crop: 2,400 × 1,800; top and bottom are trimmed.
- Portrait example crop: 1,800 × 2,400; the sides are trimmed.
- These are calculations for our example windows, not measurements of Etsy’s live placements.
Check the printed design, not only the shirt
A garment can remain recognizable after its most important design detail has vanished. Review the actual reason someone would buy this shirt: the complete phrase, the central illustration, a name or the relationship between those elements.
For a text-led design, read every line without relying on your memory of the original. A half-visible word can look plausible when you already know the phrase. For an illustration-led design, check the distinguishing feature rather than just the outer silhouette.
Next, look at the image at an ordinary small viewing size. A full shirt surrounded by a large lifestyle scene may survive every crop while leaving the print too small to judge. Aim for enough room to survive cropping and enough product presence to communicate the design. No single margin percentage solves that balance for every photograph.
- Entire phrase: no missing first or last letters, and no lost second line.
- Main illustration: its identifying details remain visible.
- Actual placement: the print is still shown where it belongs on the garment.
- Variant: the image represents the garment color and design being offered.
Choose a more useful frame in PODspy
Open Quick Mockups and compare scenes before placing your artwork. A straight-on garment view can make a text-led design easier to judge than a busy lifestyle scene. A folded flat lay may work for a compact chest graphic but hide the intended scale of a large back print.
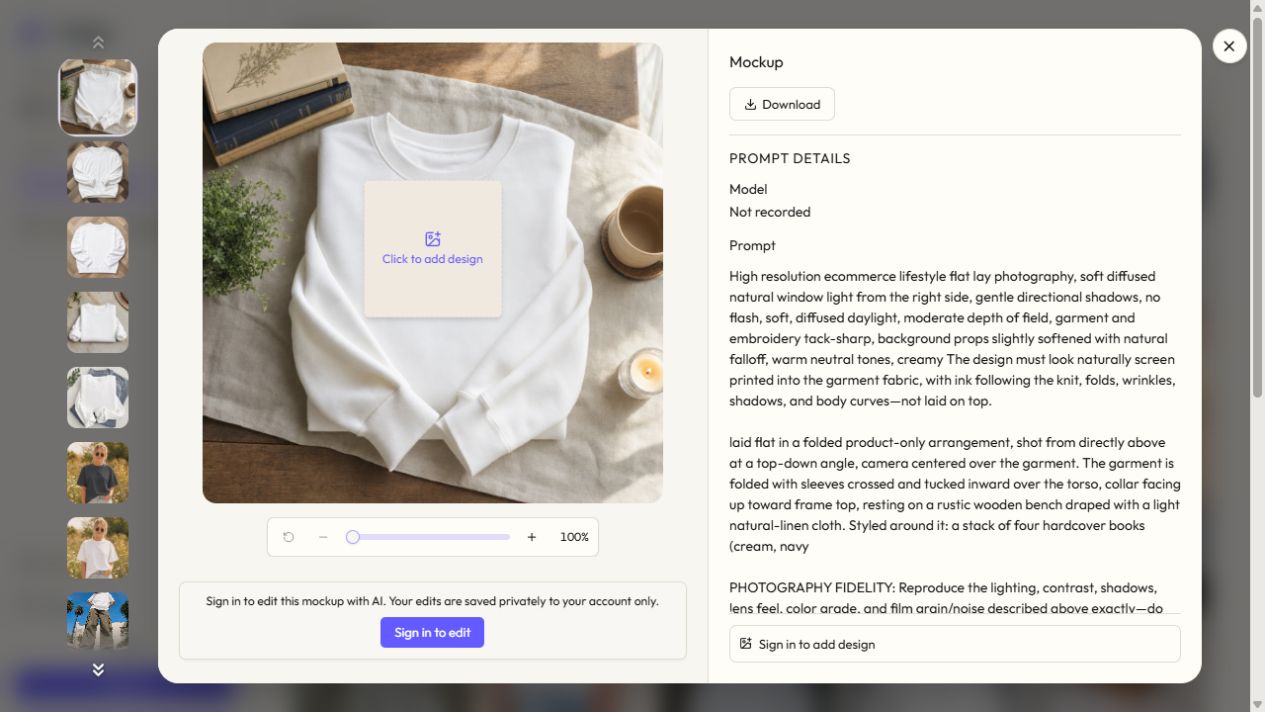
Open a scene to inspect its framing. In the current scene preview, Zoom in mockup magnifies the image; Reset mockup crop returns to the starting view. We checked those controls on November 1: zooming moved the preview from 100% to 105%, and resetting returned it to 100%. No design was submitted and no generation was run for that control check.
Zooming in cannot recover content already outside a scene’s source image. If the garment is too tightly framed at the starting view, choose another scene or return to a wider original. After signing in, Add design from library lets you begin composing with your own artwork; our mockup walkthrough covers that separate workflow.
Keep the relationship between the print and garment honest. Making only the artwork much smaller in the mockup to avoid a crop would misrepresent a product whose real print is larger. Choose a wider product view instead, and compare any generated result against the original design before using it.
Finish in Etsy’s actual thumbnail preview
Etsy’s Help Center describes this desktop path: open Shop Manager, go to Listings, edit the relevant listing and choose Adjust Thumbnail. Use its zoom and positioning controls, check the three views, then choose Apply. The first listing photo supplies the thumbnail, so confirm that the intended image is first.
Keep this adjustment separate from permanently cropping your source. Etsy notes that a saved photo crop cannot be undone in place; restoring the original means uploading it again. Preserve your master file before making that change.
After applying the adjustment, review the listing draft at full size and on a phone. Compare the visible words, image order and selected variant. The actual preview for your listing is the place to check the result.
Keep the listing image accurate while you reframe
A better crop should make the product easier to understand. It should not conceal a flaw, invent fabric texture or change the size and position of the design a buyer will receive. Preserve color and proportions when you create a listing copy.
Etsy’s current Listing Image Requirements include an exception for original designs printed by a production partner onto standard base products such as T-shirts or mugs: an authorized stock-photo mockup may be used. Other product types have different requirements, and the general accuracy rules still apply. Check the current policy for your own item rather than treating every AI image or mockup as automatically suitable.
The shirt drawings in this guide are explanatory illustrations. They demonstrate crop geometry and are not evidence of a manufactured garment, an Etsy listing test or a finished PODspy generation.
Use this final thumbnail checklist
Change one thing at a time so you can tell whether it helped. Start with the source composition, then adjust the thumbnail, then inspect the saved listing copy. If the source itself is missing a sleeve, a word or the bottom of the garment, return to an earlier version rather than expecting a crop control to reconstruct it.
Keep the accepted image and the source together with clear names, such as garden-shirt-listing-v2.jpg and garden-shirt-original.jpg. If you later change the garment color, print size or wording, repeat the visual check for the new product instead of reusing an outdated image.
- The image has enough source detail for the listing.
- The complete design remains understandable in the actual thumbnail previews.
- The garment and print proportions match the intended product.
- The first photo and the selected variant are correct.
- The saved image has been checked for color shifts and compression damage.
- The current image policy has been checked for the item being sold.
Common Etsy thumbnail questions
Should I make every photo square? A square source does not remove the need to check other thumbnail shapes. Choose a clear first image and use the current Etsy preview to assess its framing.
Will a larger export stop cropping? No. More pixels may help detail, but a crop can remove the same fraction of a larger composition. Add useful space around the product in the source view.
Can I fix the crop by moving the design on the shirt? Only if that change also represents the real product you will deliver. For a listing-image problem, reframe the photograph or choose a different mockup scene before changing the apparent print placement.


