 PODspy

To design a phone case for print-on-demand, download the template for the exact phone model and case style. Put the important parts of your artwork inside the safe area and clear of the camera opening. Extend the background to the template’s bleed line where required. Repeat the check for every model you intend to sell. One artwork master can serve several variants if you keep the subject and background separate while you lay them out.
The creative shortcut
- Start with the print provider’s template for the exact phone model and case style.
- Keep the subject and lettering on the safe part of the back. Let expendable background reach the bleed.
- Reuse an editable master, then check the artwork file and storefront preview for every variant.
Get the template for the exact model and case
Write down the print partner, phone model and case style before choosing a canvas size. A rear print on a clear case can have a different printable area from a tough case that wraps around the sides. The outer dimensions of the phone are a poor substitute for the provider’s print file because they leave out the case construction, the camera opening and the bleed.
For example, Gelato describes a printable rear surface on its Clear case and wraparound printing on its Tough case. Its phone case help page explains where to find templates on the product page and lists its own file requirements. Use the guidelines for the case you actually choose.
Keep the downloaded template locked above your artwork in an editable file. Put the background on its own layer. Keep the illustration and any words on separate layers so you can move them together or independently as the camera opening changes.
Mark the safe area, camera opening and bleed
Read the template legend. The safe area is where essential details belong. The print or trim guide marks the intended edge on templates that use one. Bleed is extra art beyond the intended edge to cover small placement shifts. The camera opening is a separate exclusion area. Keep the bird’s head, lettering and other must-read details away from it, including any clearance the provider marks.
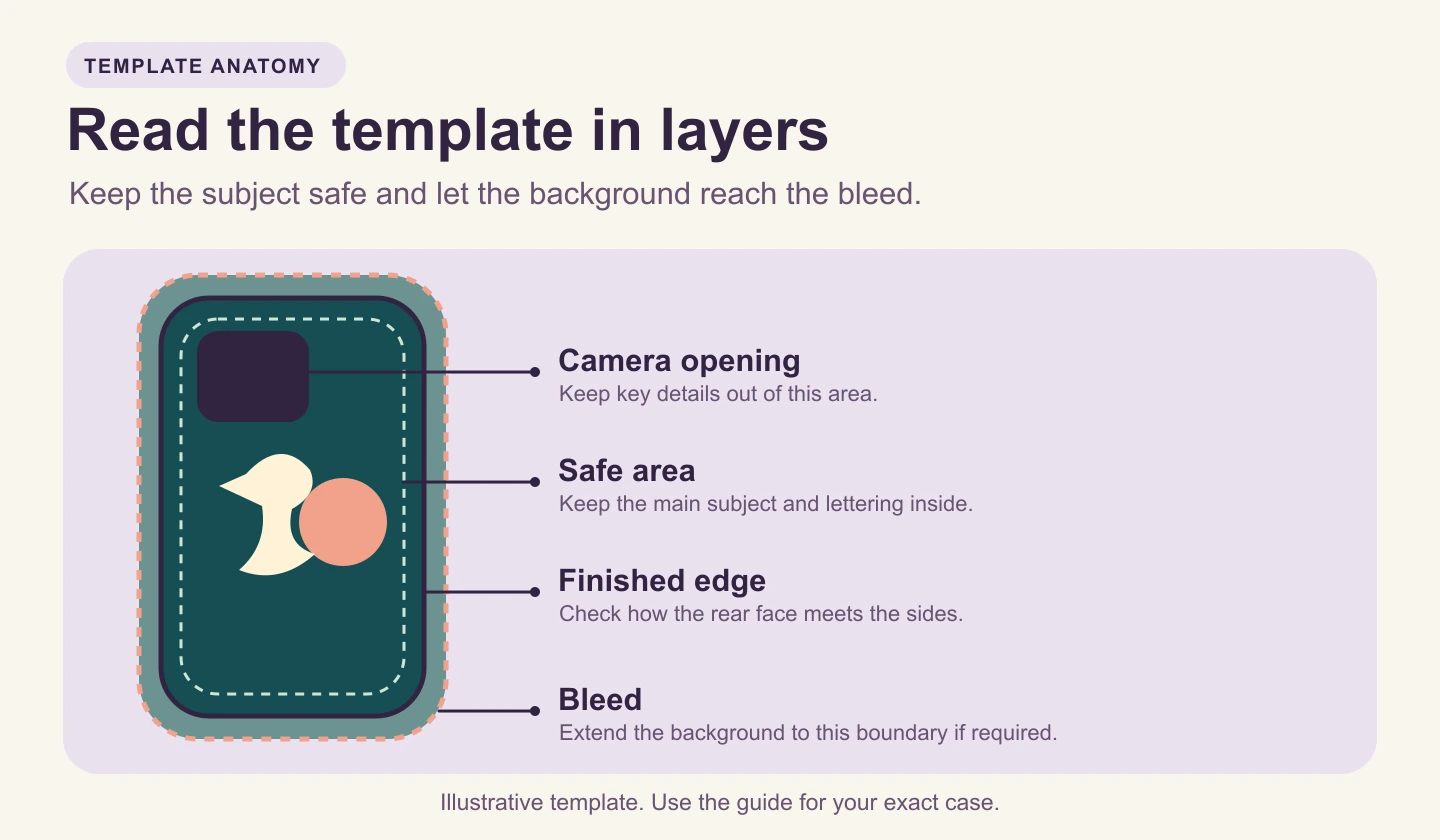
For a full-coverage case, run a solid color, large shapes or a pattern out to the requested bleed. Keep the design’s key shapes on the rear face, where the viewer can see them straight on. If you want the phone to show through a clear case, check how that specific provider treats transparency before adding a solid fill.
Zoom out to a small product preview. If the design works only because you can see a thin line beside the camera or read tiny type near an edge, give that element more room or simplify it.
Test the same artwork on two camera openings
Imagine a portrait canvas in which the heron’s head starts 560 pixels from the top. On example model A, the camera opening reaches 460 pixels down. The head clears it. On example model B, the wider opening reaches 730 pixels down in the same horizontal area, so it would hide part of the bird. These pixel positions describe the illustration below, with the top of each example canvas as zero.
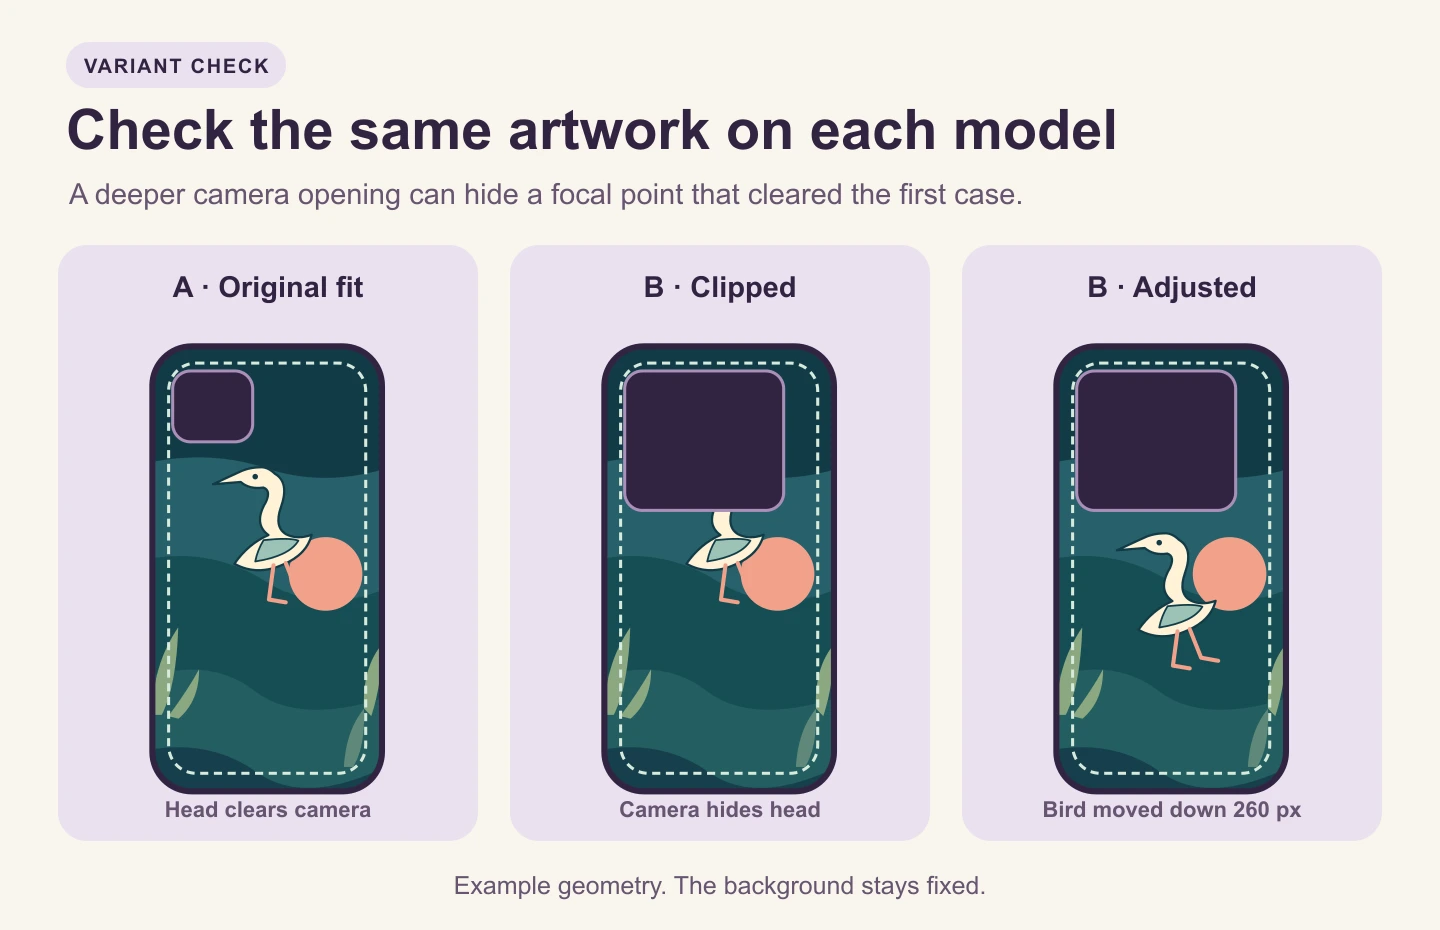
Move the bird layer down 260 pixels on model B, so its head starts at 820 pixels. In this example the whole bird still fits inside the safe area and the background stays in place. That leaves 90 pixels between the lower edge of the camera opening and the top of the bird in the illustration. Use the supplier’s actual clearance, then inspect the bottom of the bird and any text. If moving the subject causes an edge collision, reduce or simplify the subject and recheck its readability.
If the artwork has one important motif, review it under each model’s overlay. If the design is an all-over repeat, check that the pattern still looks balanced where the camera and edges interrupt it. Keep the motif scale consistent when the templates allow it.
Make a reusable artwork master
The starting brief below opens in PODspy’s Generate Image workspace as editable text. You can ask for a quiet upper area and a low focal point, then choose whether to generate. The editable brief helps you explore artwork. Keep the model template as the reference for final placement.
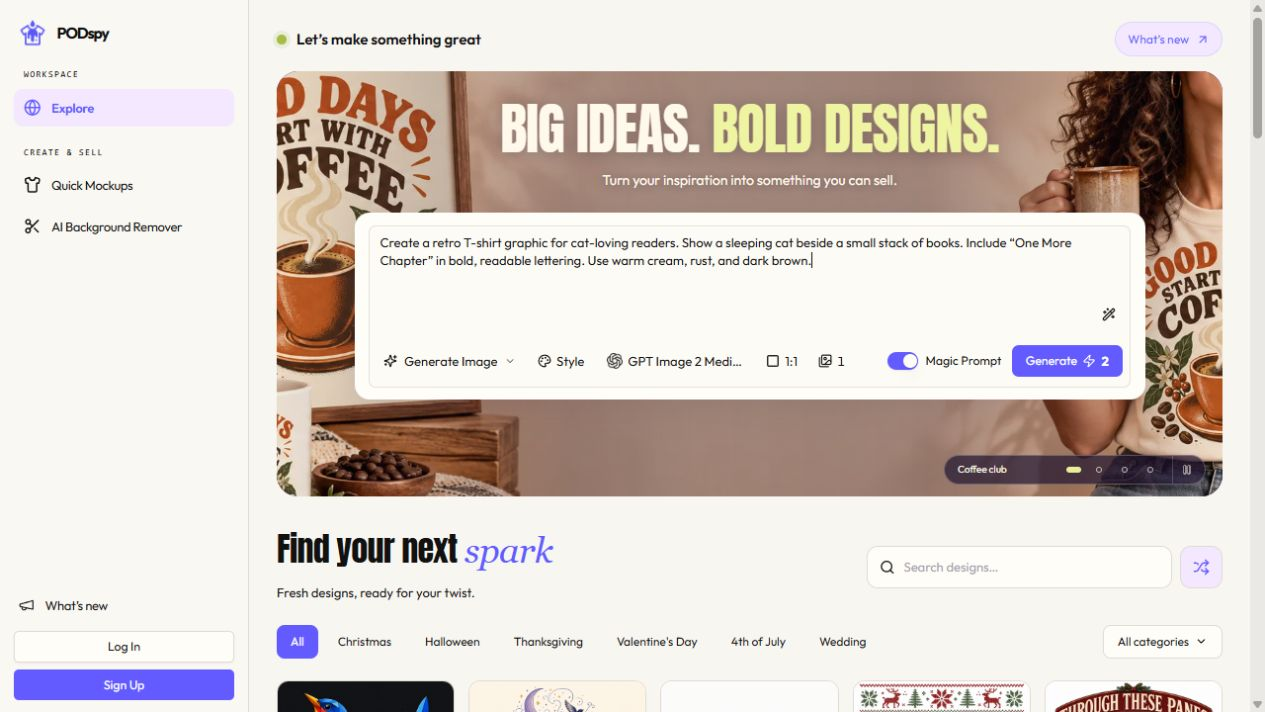
If you want to move the subject later, save a separable subject and a background or rebuild the elements as layers in your layout editor. A single flattened image is harder to reposition without leaving an empty patch. Keep a copy of the original art before trimming it to a particular case.
Create a vertical print artwork master with a single ivory heron wading in a dark teal marsh, a muted coral sun low on the right, and a few broad sage reeds. Place the whole bird and sun in the middle to lower half, with generous space around them. Keep the top quarter quiet with only broad bands of dark teal and soft blue-green. Continue the background to every edge so it can be cropped. Use flat shapes, firm outlines, and a limited palette. Show the artwork only. Do not add text, a logo, a border, a phone case, a camera opening, a mockup, or a template.
Export and check each variant before listing
Duplicate the editable layout for each case model. Hide the template and guide layers before export unless the provider instructs you to include something specific. Follow the format, dimensions and resolution shown for that product. Name the final file so you can match the art, phone model and case type when you upload it.
Open the supplier preview for each selected model. Where the editor offers a model-specific design control, use it for any model that needs a different placement or file. Printify documents a size-specific option in its template guide. If your provider shares one layout across models and a preview fails, change the artwork to fit all supported models or offer the incompatible model separately.
Confirm the buyer-facing model name and preview match the production file. Look at the camera opening, four corners and sides, then check that the subject reads at listing size. A sample lets you see the printed edge and how the artwork looks on the physical case.
- Correct model, case style and template.
- All must-read shapes clear the camera and edges.
- Background covers the required bleed. Guides are hidden.
- Each model preview and listing image matches its file.


