PODspy

To make a seamless pattern, build one repeat tile whose artwork continues across opposite edges, then test that exact exported file in a larger repeat. A convincing-looking square is only the starting point. This guide uses one original leaf study to show the edge coordinates, the corner copies and the checks that matter before you use a pattern on a print-on-demand product.
The creative shortcut
- Copy crossing motifs by one exact tile width or height.
- Test the exported file in a repeat before uploading it.
- Check physical motif scale and each product’s own template.
Start with a repeat tile, then plan the product file
A tile is the small repeat unit. A repeat preview is several copies placed together so you can inspect the joins. A product print file is the canvas or template your supplier needs. Keep these as separate files: a screenshot of a tiled preview can contain guides, extra margins or the wrong dimensions for production.
Choose a simple grid repeat for your first design: identical tiles sit directly beside and above one another. A half-drop repeat adds a different placement rule between columns. Establish a clean grid repeat before experimenting with those other arrangements.
Our worked example uses a 1,200 × 1,200-pixel tile. That is a manageable teaching canvas, not a universal print specification. Before selling a design, obtain the exact product template, accepted file types and resolution guidance from the supplier you will actually use.
Create one useful motif in PODspy
Start with an object you can arrange as an individual element: a leaf, small flower, abstract shape or simple illustration. A single isolated motif gives you control over spacing and edge copies. A generated sheet of many overlapping objects can be harder to separate and repair.
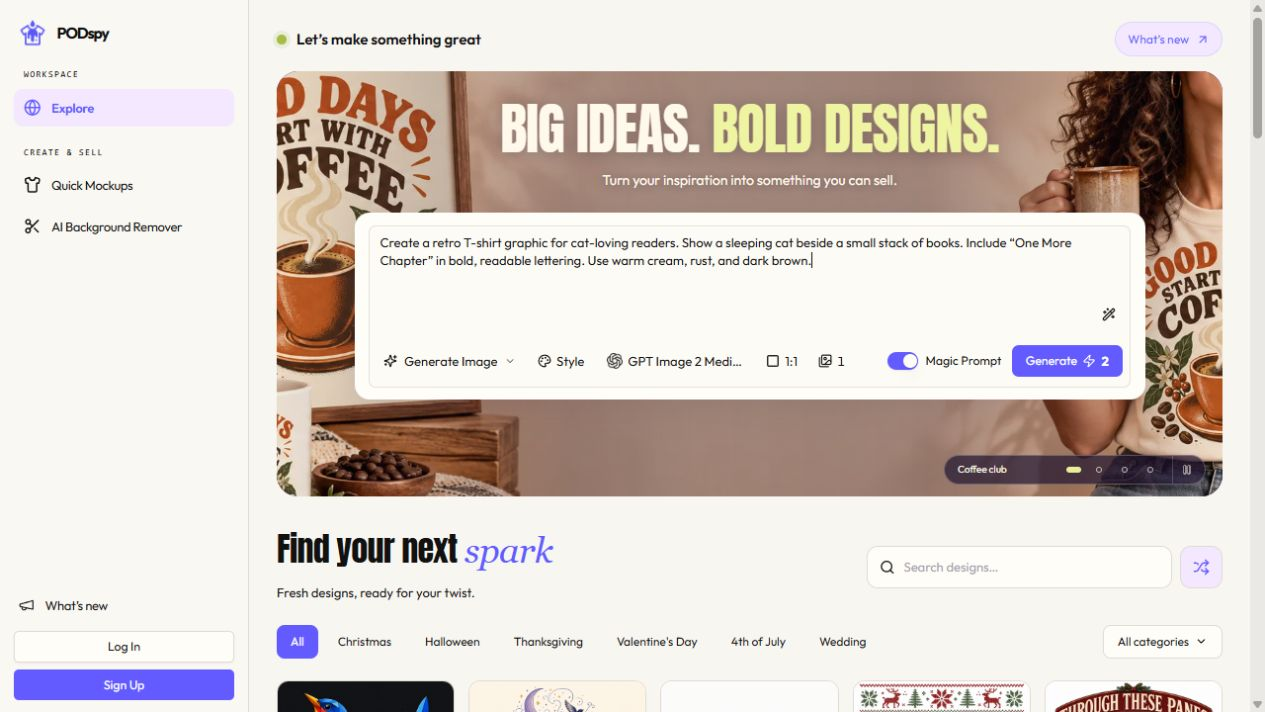
In PODspy, choose Generate Image in the Create mode menu and enter a clear brief. We rechecked the live editable prompt field, square aspect-ratio control and separate Generate button on November 4. The brief below opens Generate Image with the exact text filled in; you can edit it before choosing to generate.
Inspect the result you choose, remove or prepare its background when needed, and check its exported dimensions. Plain white pixels are not transparency. The PODspy step supplies the artwork; use a layout editor with numeric positioning or repeat controls to build and verify the tile. A prompt requesting seamless artwork does not establish that its edges actually join.
Create one original fan-shaped ginkgo leaf illustration for a surface-pattern motif. Use a short gently curved stem, a broad scalloped fan and a few clear dark-plum veins. Use warm chartreuse and a restrained coral accent in a simple flat editorial illustration style. Keep the entire leaf isolated in the center with generous plain white space around it. Show flat artwork only. Do not include a repeating pattern, grid, border, fabric, product mockup, shadows, text, logos, measurements or watermark.
Use exact coordinates for every edge copy
Create a fixed-size canvas and keep the background on its own layer. Arrange a few motifs inside it. When a motif crosses the right boundary, duplicate it and move the copy left by exactly the tile width. Keep its vertical position, size, rotation and appearance unchanged. Use the same positioning reference for both copies.
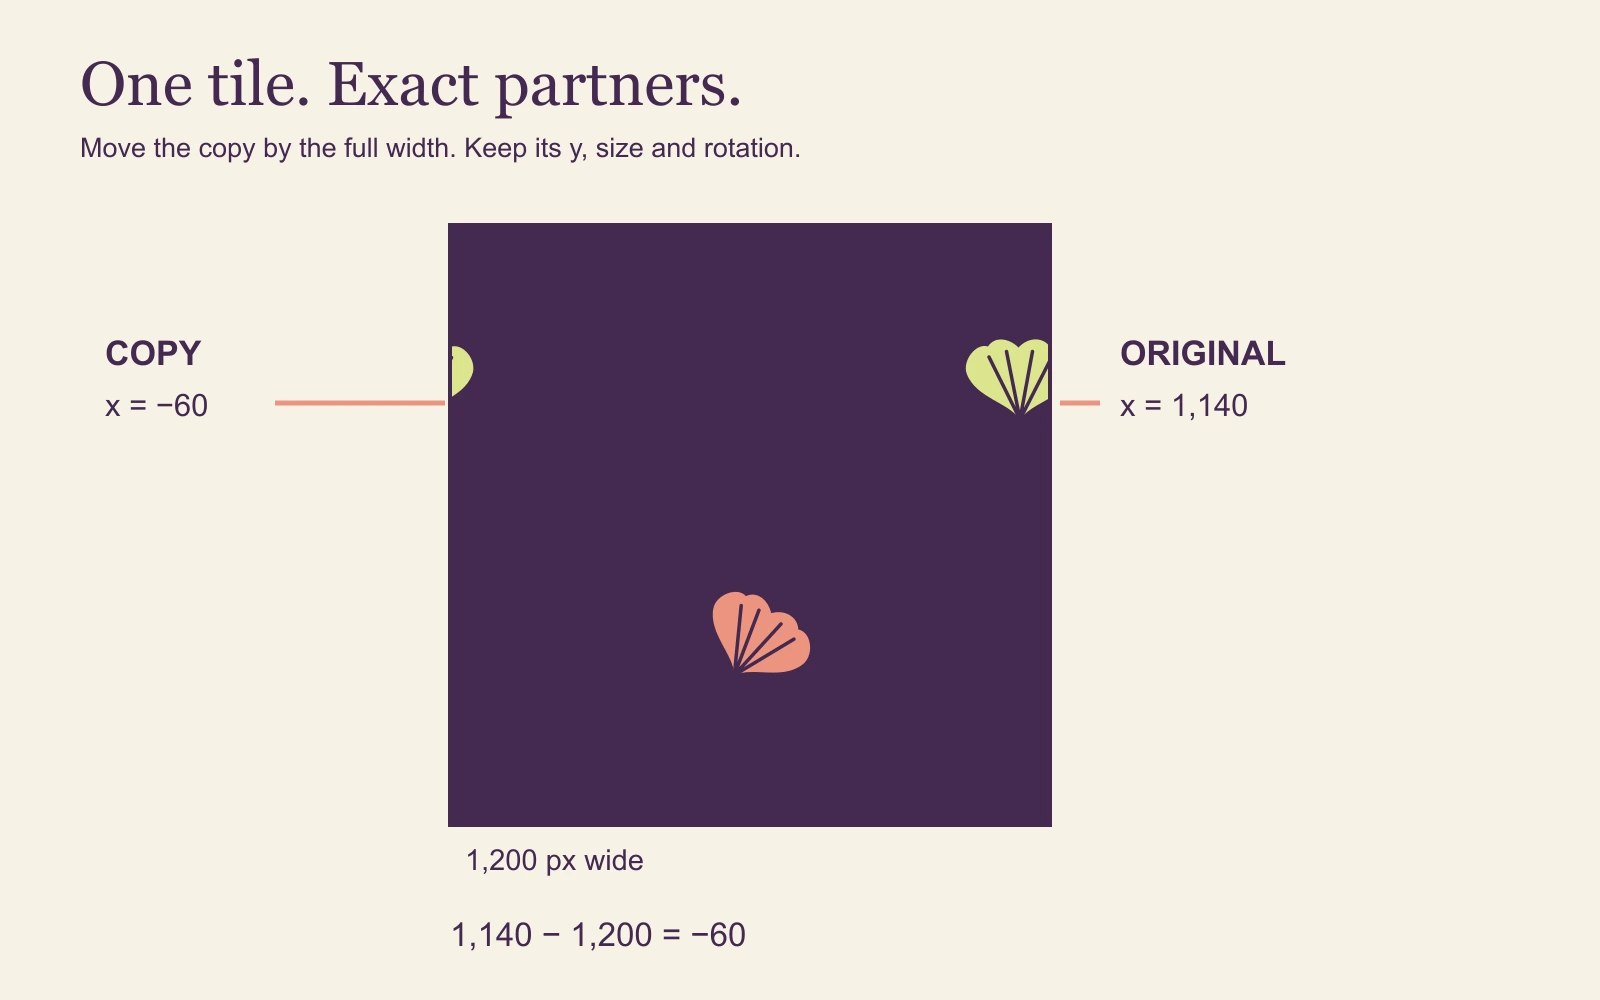
For our 1,200-pixel-wide tile, a motif positioned at x = 1,140 gets its matching copy at x = −60: 1,140 − 1,200 = −60. Both keep the same y value. Do not drag the copy approximately into place or shrink it to fit inside the left edge. The part outside the canvas is intentionally clipped.
For a motif crossing the bottom, subtract the tile height from its y position. The reverse directions use addition: a left-edge crossing gets a partner one width to the right; a top-edge crossing gets a partner one height below. On a rectangular tile, use its actual width for horizontal copies and actual height for vertical copies.
Give corner crossings all four matching positions
A motif that crosses both the right and bottom boundaries needs more than one partner. In the worked tile, a motif at (1,140, 1,140) also appears at (−60, 1,140), (1,140, −60) and (−60, −60). Those four copies complete the same object wherever four tiles meet.
Treat a boundary motif and its partners as one editing decision. If you rotate or recolor the original later, update the copies too. A linked copy or symbol can make that easier when your editor supports it. Otherwise, name the group clearly and replace all partners together.
Only clip the final view to the tile boundary. Keep an editable source with the full motifs and their copies, so the next adjustment does not require rebuilding a cropped leaf from a flattened export.
Test the exported tile, not only the working document
Export just the original tile bounds, reopen that saved file and place four copies in a 2 × 2 arrangement with no gaps or overlap. At 100% zoom, inspect the central vertical join, horizontal join and four-way intersection. A 3 × 3 repeat is useful for seeing whether empty bands or obvious clusters repeat across the surface.
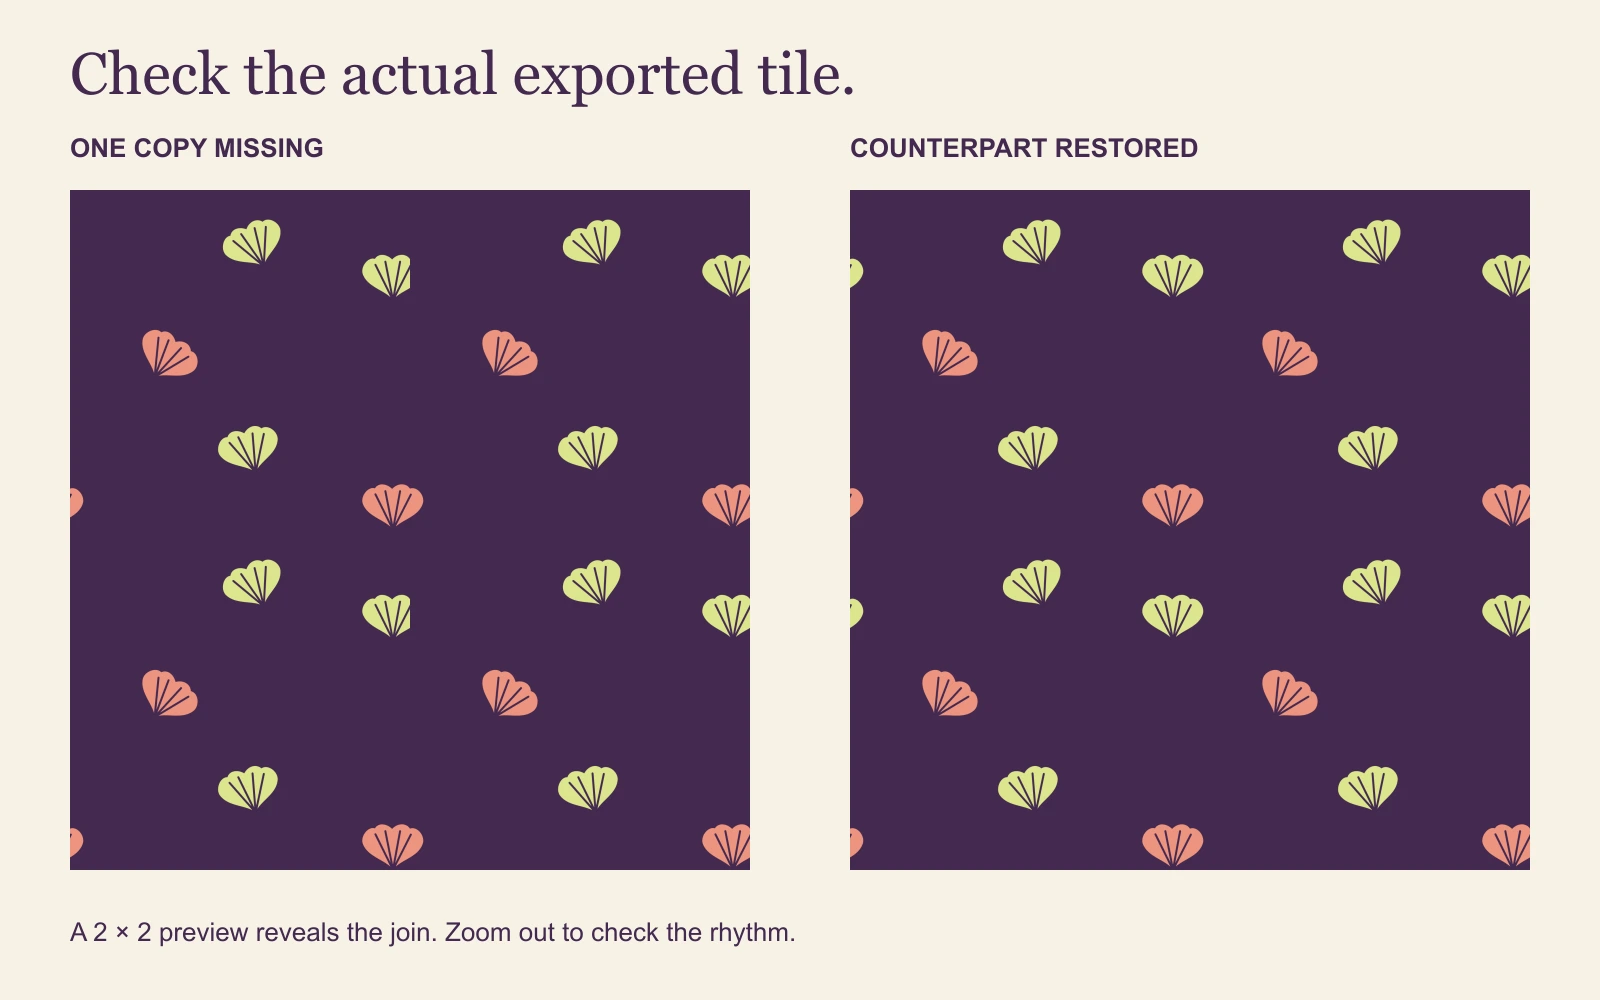
Our paired examples deliberately omit one wrapped edge copy in the broken file. The checked file restores it. The comparison was assembled from the actual exported teaching tiles. Open the two PNGs below and repeat each one in an editor to see the difference yourself; neither file is an AI result or a physical print test.
Look beyond hard breaks. A technically connected tile can still create a visible checkerboard, a row of identical dark spots or wide empty stripes. Zoom out to judge that larger rhythm. Move the interior motifs or redistribute color while maintaining the exact boundary copies.
For another inspection view, shift a copy by half its width and height with wrap-around enabled. On this example, that means 600 pixels in each direction. The old outer joins move into the center for inspection. Offsetting alone does not repair a mismatched design. Adobe documents Pattern Preview for arranging repeated artwork and Edit > Define Pattern for saving it; defining a pattern is also not a seam repair.
Choose the physical repeat size before filling a product
A tile’s pixel dimensions and its printed size are different quantities. Divide pixels by the intended pixels per inch to calculate the physical repeat. If a supplier requires 300 PPI at placement size, a 1,200-pixel tile spans 4 inches at that resolution. The same pixels across 8 inches provide 150 PPI. Use the actual supplier requirement rather than assuming one number fits every product.
Choose the visible size of the motif first. A leaf that looks balanced on a blanket may be much too large on a small accessory. Record the intended repeat width alongside the tile filename, then check the product preview at a realistic viewing size. Filling a larger area with more repeats preserves motif size; enlarging a single tile changes it.
If you need a finished product-sized raster file, fill the supplier’s exact canvas with the repeat and export that separate file. If the supplier’s editor supports repeating a tile directly, check its scale and positioning controls there. In either case, inspect the uploaded result after any automatic resize or fit operation.
Check every print area, bleed and size variant
Printify documents a Pattern tool in Product Creator for making all-over patterns. It also distinguishes the safe, print and bleed areas of a product template. Follow the current instructions for the exact product: extend the background where required, keep essential content inside the marked safe area and inspect every print area.
A seamless digital tile does not guarantee that a leaf will line up across a sewn garment seam. Printify’s safe-area guidance explains that AOP design positions can vary relative to the mockup. A matching digital repeat does not determine where separate fabric panels are cut and sewn. Small positioning differences can also change what gets clipped near cuffs, collars or panel joins. Avoid making a recognizable face or important word depend on perfect seam alignment.
Check each size variant when the provider recommends separate placement adjustments. Save the tile, editable layout, final production export and listing mockups under different filenames. A mockup demonstrates intended placement; order and inspect a physical sample before claiming a particular printed color, material appearance or finished result.
Common seamless-pattern questions
Can I use an AI-generated image as a tile? Yes, as starting artwork. Repeat the actual export and inspect it. A convincing pattern aesthetic and a prompt containing seamless are not evidence that its boundaries match.
Do I have to mirror the artwork? No. A grid repeat uses translated copies. Mirroring changes the artwork and can create an obvious reflection line. Use it deliberately when it suits the design, not as an automatic substitute for matching edges.
Why do I still see a line? Check for a missing boundary partner, a transparent border, a background that stops short of the canvas, or a fractional gap between placed copies. Compare the saved file at 100% with your editor preview before assuming the artwork itself is defective.
Which file should I keep for the next product? Preserve the editable tile and its checked export. Reuse that artwork, then make a new checked layout for the next product’s template and intended motif scale.