 PODspy

A drink coaster may start in a square artwork file even when the finished product is round. The middle of the design can look fine while a leaf tip, corner mark or line of type falls outside the round safe area. If you want to sell both shapes, build one motif and check it in each provider template before exporting.
The creative shortcut
- Fit the essential artwork inside the round template’s safe area, including the corners of any square motif.
- Keep the motif on its own layer so you can move it without disturbing the full-bleed background.
- Preview both shapes at actual size and place a glass over the layout before approving each export.
Start with the exact coaster blank
Choose the supplier, shape and finish first. Open the template for each shape and mark three boundaries on a guide layer. Bleed is where the background extends beyond the finished edge. Trim is the finished outline. The safe area is where names, lettering and recognizable parts of the artwork should sit.
Check the actual artwork size and sides supported for your product. Gooten lists a 3.75-inch-square cork-backed coaster with front image placement and its own templates. Printify lists a 3.7-inch product in round and square options. The physical sizes tell you what the buyer sees. Use the individual template for the upload dimensions and margins.
Test the corners with a round mask
Try a 4-inch finished coaster as a worked example. DeFrance Printing’s 4-inch round template calls for ⅛ inch of bleed when artwork reaches the edge. That extends a 4-inch diameter to 4¼ inches across the bleed. For this exercise, draw a 3½-inch safe circle inside the trim. Use the supplier’s own safe boundary on a real job.
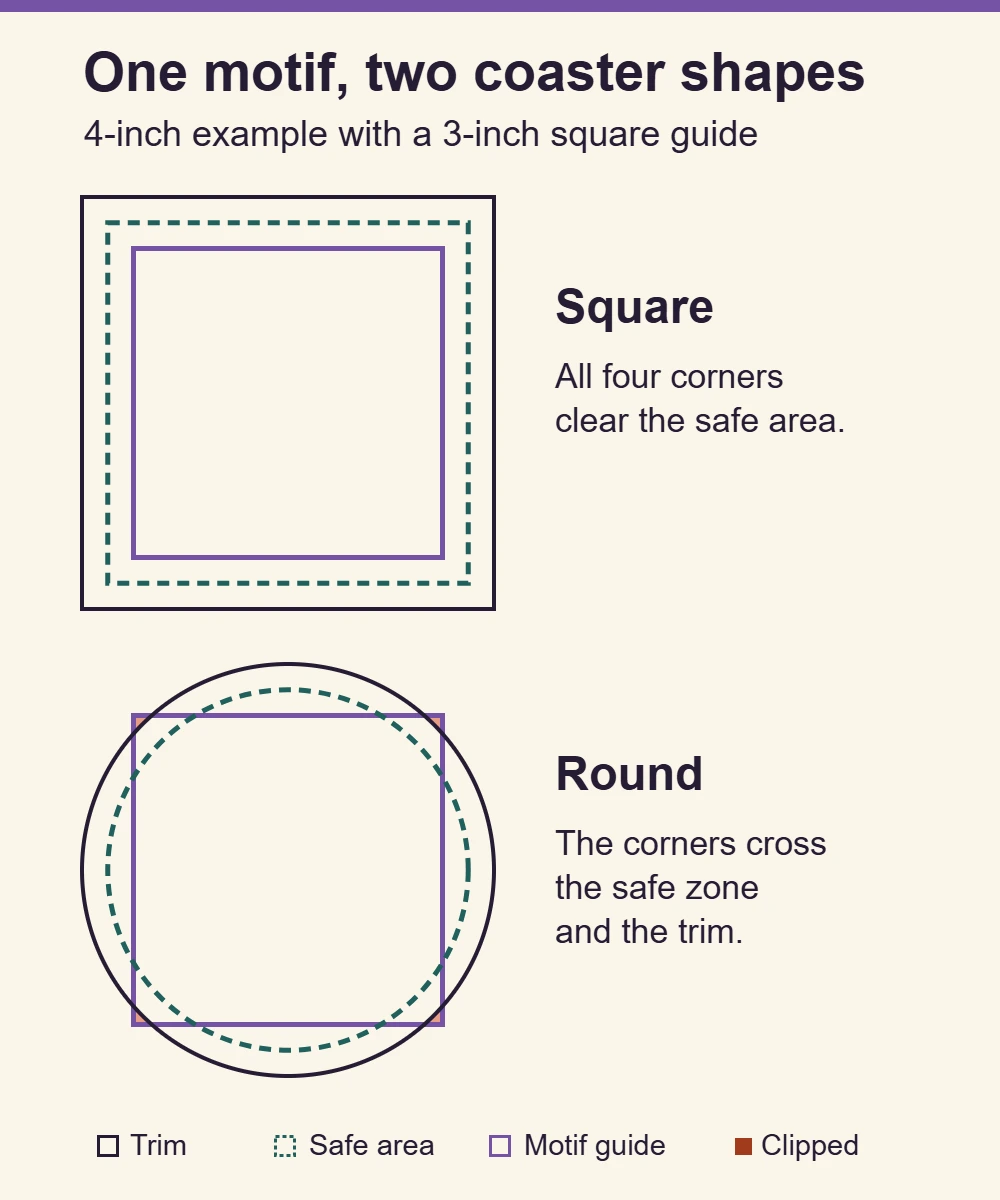
A centered 3-inch square fits inside a 3½-inch-wide square safe area. Across its diagonal it measures about 4.24 inches, so its four corners extend past the 3½-inch safe circle. To preserve every corner, size the essential square to about 2.4 inches or less, or move corner details inward. A 2.4-inch square has a diagonal of about 3.39 inches. Check the actual artwork against the circle as well, especially if you move it off center.
Duplicate the layout. On the square version, use the space near the corners for optional accents. On the round version, bring the leaf tips and any text inside the safe circle. Let the background continue to the bleed in both versions. A mask or guide makes this easy to see while editing. Export the rectangular bleed canvas or clipped shape according to the printer’s instructions.
Make one motif that works in both shapes
Start with a compact silhouette. This citrus example uses one orange slice and two leaves. Put any shop name or personalized text on a separate layer in the layout editor, so it stays editable and you can move it for each cut.
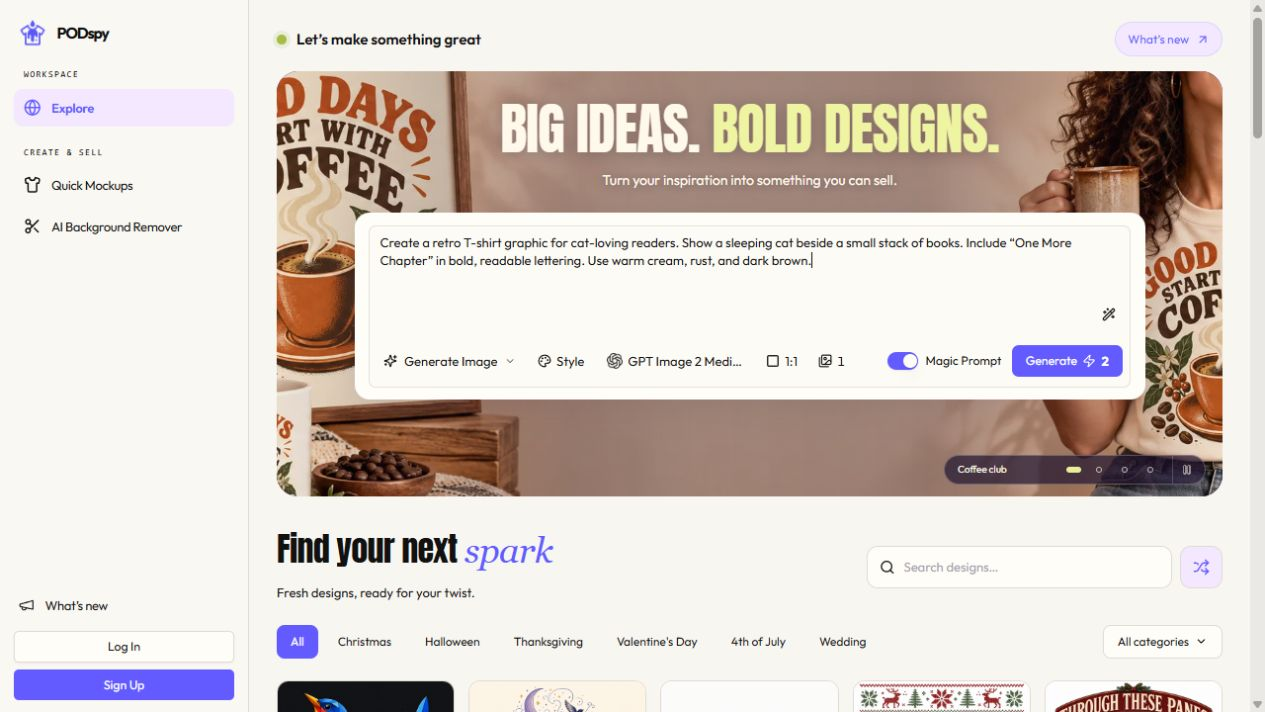
The brief opens as editable text in PODspy’s Generate Image workspace. When you choose to generate, look for a result with room around the leaf tips. Place the selected artwork into each supplier template and handle background extension and layout there.
Create flat square artwork for a drink coaster set with one compact centered burnt-orange citrus slice and two small dark teal leaves. Use crisp, bold printmaking shapes with simple wedge segments. Keep the entire silhouette comfortably inside the central half of the image, surrounded by flat warm cream space that reaches every canvas edge. Keep all corners plain. Show artwork only. No lettering, circles framing the composition, coaster mockup, bevel, shadows, or template marks.
Check the set at the size a buyer will see
Display each coaster at actual size or make a plain-paper layout proof at 100%. Measure the finished outline with a ruler. Put a glass on the center of the proof, then slide it slightly to one side. If the whole motif disappears, decide whether that is fine for the set. Move a small accent into the uncovered part of the safe area when you want some color to show during use.
If the provider accepts a different image on each coaster, keep the motif scale and background consistent across the set and vary one detail, such as the slice color. Review the lineup side by side. Check that leaves, lettering and any accent all clear the relevant safe boundary, with room for slight trim variation.
Save clearly named exports for each shape and variant, such as citrus-round-orange and citrus-square-orange. Hide the guides unless the provider explicitly requires a production layer. Reopen the exports in the supplier preview and confirm shape, file placement and the full-bleed background before you publish the listing.


