 PODspy

A hoodie design should fit the print area for the exact garment, provider, and decoration method you plan to sell. Start with that template and decide how wide and tall the visible artwork should be. On the front, the pocket and drawcords can make a wide, short layout easier to use than a tall T-shirt design. On the back, the resting hood can hide the top of an otherwise valid layout. Here’s how to check both before you upload.
The creative shortcut
- Get the print area for your exact hoodie, method, placement, and size range.
- Fit the artwork using whichever dimension runs out first.
- Check front clearance, hood overlap, and the smallest size before approving the listing.
Find the print area for the exact hoodie
Record the blank, print partner, decoration method, garment sizes, and print location. Open that product’s file guidelines or template. A garment’s size chart tells you how the blank fits a person. The print template tells you where the provider can put your artwork.
Check the chosen technique and location together. For example, Printful lists front and back printing on its Gildan 18500, and lists left chest as an embroidery location. This tells you where to look for specifications on that product. It does not give you the dimensions for a different supplier or decoration method.
Keep the maximum print area, the file canvas, and the visible ink bounds separate in your notes. The supplier may ask for a full template-sized file, even when the design occupies only part of it. Use any safe area specified in the template and verify where the provider previews the artwork.
Fit the front artwork by width and height
For a pullover, start with the space above the pouch and check where the drawcords hang. Suppose the usable box on your template is 12 inches wide by 8 inches high, and you want to reuse a 10-by-12-inch shirt design. The height runs out first. At 8 inches tall, the original proportions make the graphic about 6.7 inches wide.
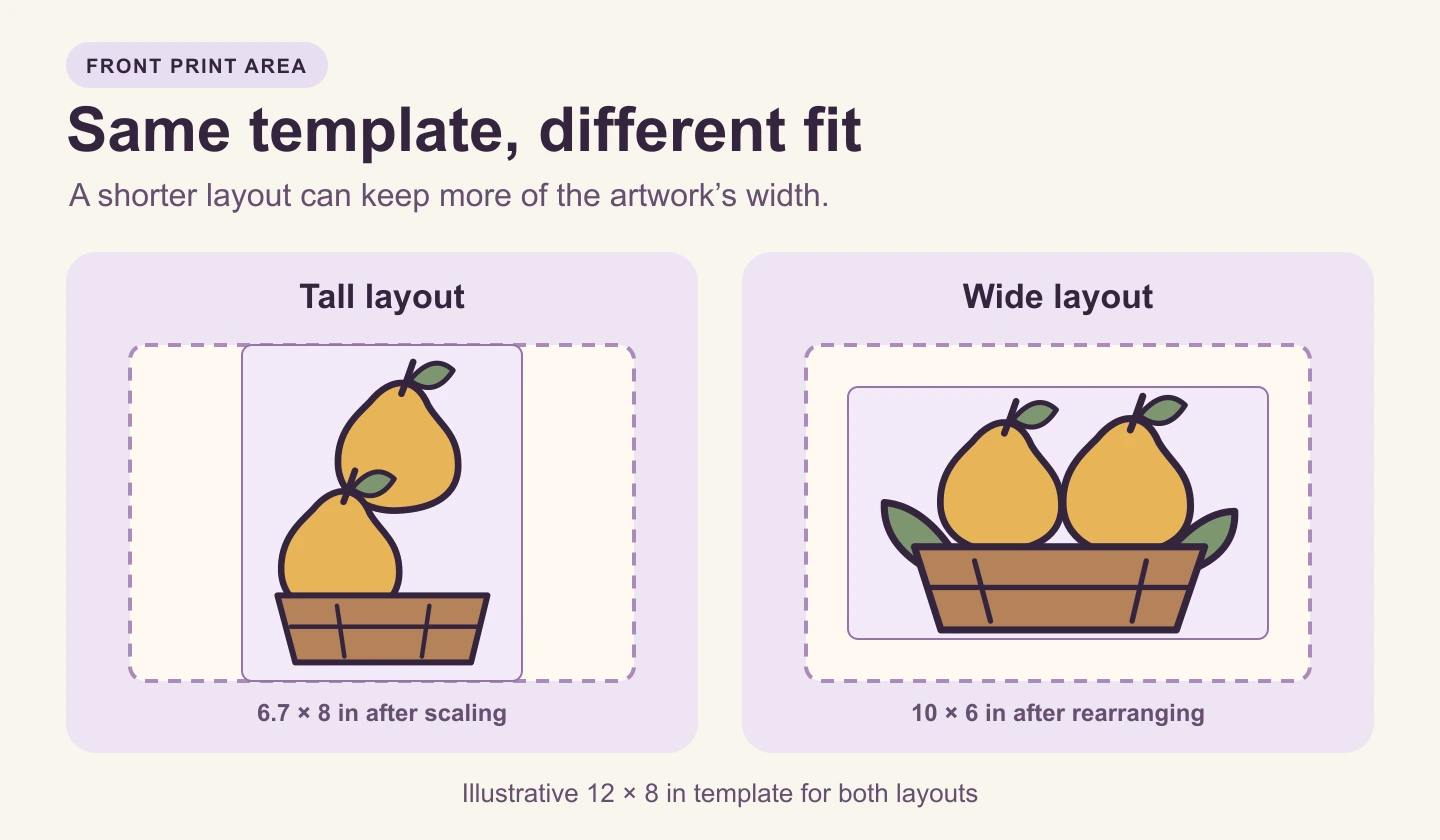
To calculate the fit, divide available width by artwork width, then available height by artwork height. Use the smaller ratio to scale both dimensions. That gives you the largest proportional fit before any extra clearance you want for the pocket, cords, or the visual balance of the garment.
If a 6.7-inch-wide design feels too small, rearrange the art. The example moves the pears side by side in a lower crate so the motif can occupy a 10-by-6-inch box. The narrower stacked version can still be useful on the back if it clears the hood. These are planning dimensions, not a recommendation for every hoodie.
At a requested 300 pixels per inch, a 10-by-6-inch artwork needs 3,000 by 1,800 pixels across the artwork area. If the provider wants the full 12-by-8-inch template at that resolution, make the canvas 3,600 by 2,400 pixels and position the art within it. Follow the supplier’s actual file settings.
Check the hood, zipper, and sleeve as separate placements
Use a back view with the hood resting down. Mark the area it covers on your garment reference, then check whether any lettering or focal detail falls inside it. Check the hood-up view too. A flat template can confirm that your artwork is within the provider’s box without showing how it reads when worn.
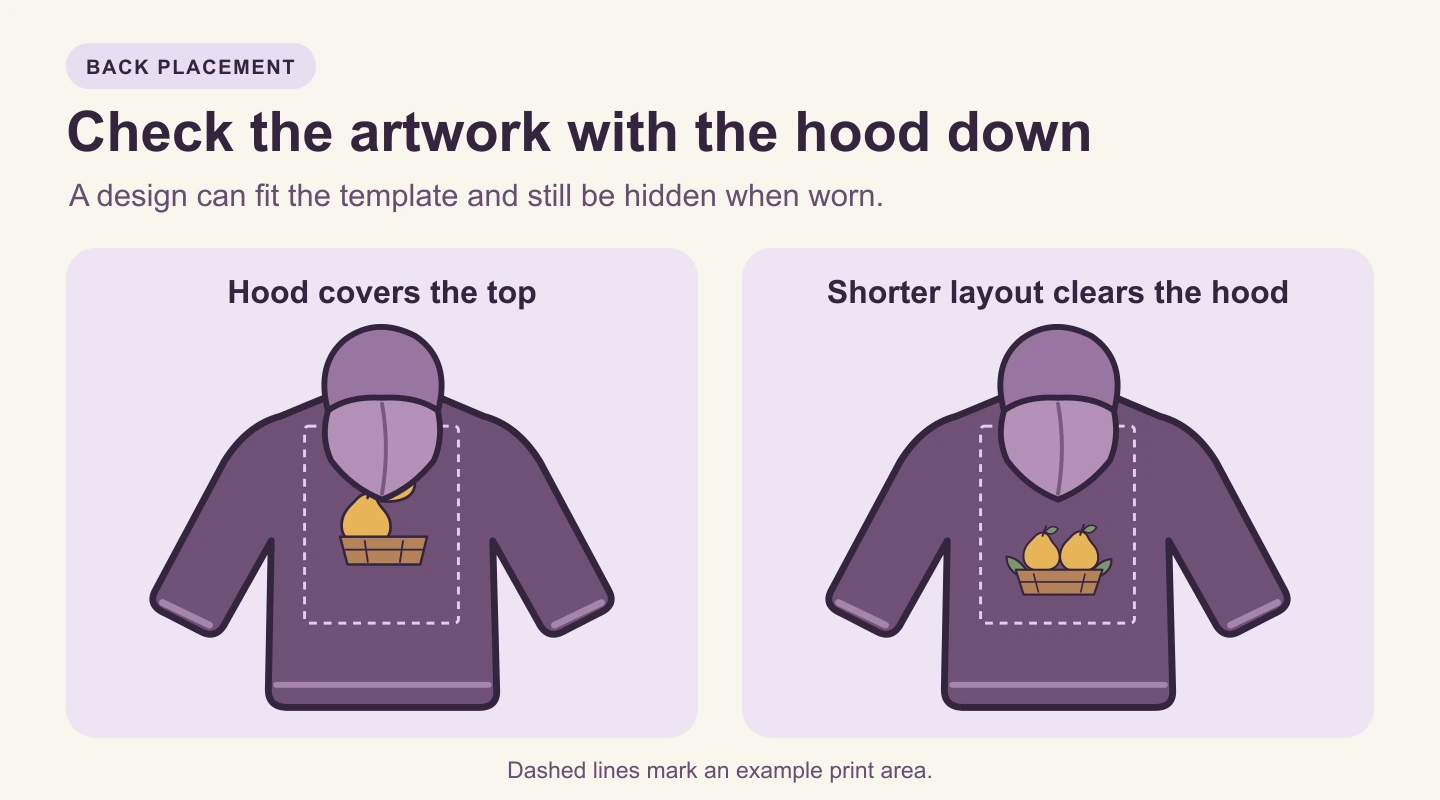
For example, if a simplified 10-inch-tall back box has its top 2 inches hidden by the hood, 8 inches remain below it in that overlap zone. A 9-inch-tall graphic that needs to be completely visible cannot simply shift down and still fit there. Make it shorter, change what sits at the top, or choose another location. Use the actual garment reference for this check.
A zip front divides the center. If the provider doesn’t support artwork across the zipper, use an approved side placement or move the main design to the back. For sleeve artwork, confirm which sleeve and which end reads first, then preview it on a garment with the arm down.
Make a compact version of your artwork
Start with one subject you can rearrange. The original example uses two pears and a market crate. Give the front version a broad outline and keep its details large enough to read at the intended print size.
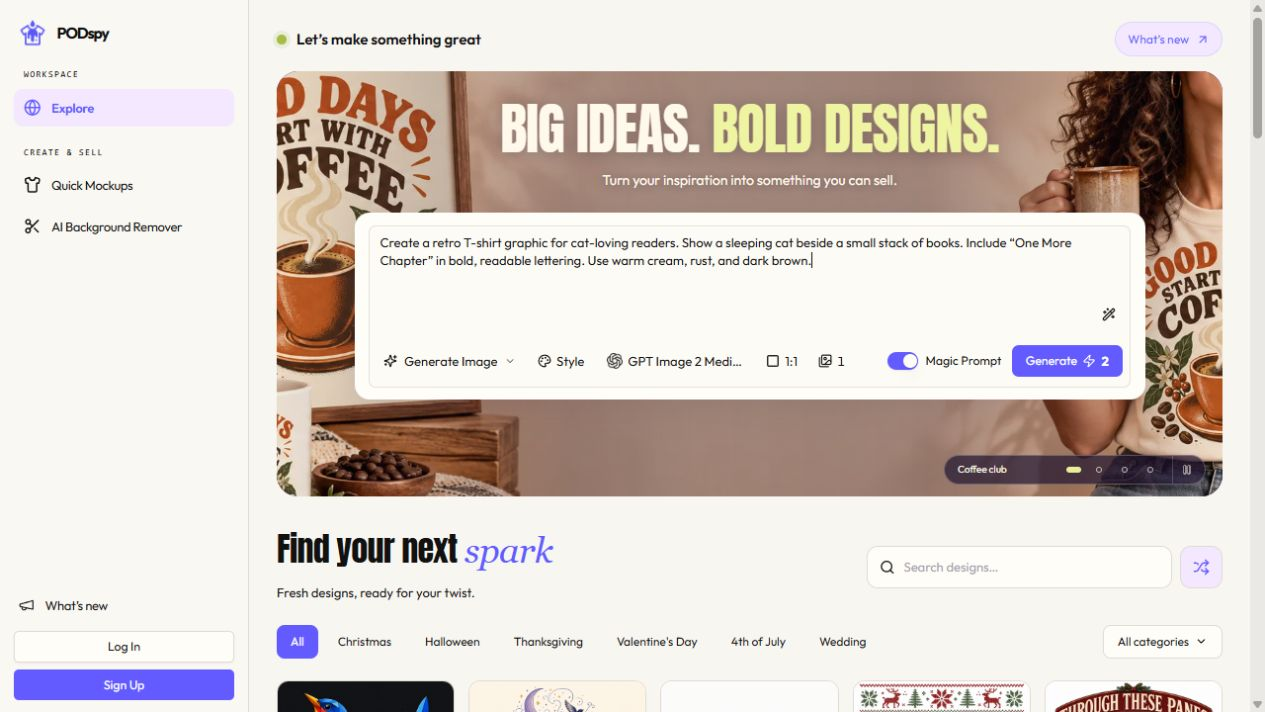
The brief below opens in PODspy’s Generate Image workspace with the text ready to edit. After choosing to generate, inspect the shape and details before preparing your file. If the product needs a transparent background, verify the exported file instead of relying on the prompt’s white backdrop.
Save the artwork separately from the garment reference. Keep the hoodie lines, measuring marks, and any template guides out of the production file unless the supplier explicitly asks for them.
Create an original wide illustration for the front of a pullover hoodie: a low wooden market crate holding two golden pears, with one large sage-green leaf on each side. Use thick plum outlines and flat cream, muted gold, and sage colors. Arrange the pears side by side so the silhouette is wider than it is tall. Keep the illustration compact, with no tiny details or loose specks. Show artwork only, centered on a plain white background. Do not add a hoodie, mockup, text, logo, border, shadow, or colored background panel.
Check the smallest and largest variants before listing
Compare the proposed print width and height on the smallest and largest sizes you will sell. Some products retain the same physical print size. Others use a smaller area and downscale the artwork. Printful documents proportional downscaling on some DTG and DTFlex products and tells sellers where to check it in File guidelines.
For each variant, keep the artwork filename, intended size, placement, and supplier preview together. Check that the compact front clears the pocket and that the back stays understandable with the hood down. If a version changes size automatically, inspect details at that smaller scale before reusing the larger preview.
Use the supplier proof or a physical sample to confirm what the listing promises. A mockup helps you inspect composition and apparent scale. The actual garment is how you check the resting hood, fabric folds, and the final print position.
- Record blank, provider, method, and location.
- Write down both artwork dimensions and the template canvas size.
- Check pocket, cords, hood, and zipper for the intended garment.
- Verify at least the smallest and largest planned variants.


